
DICE - it's tiny, compact, rigid and superfast.
This time I did it different. My previous printers had daily buildlogs and status-updates, but this one was build on the QT.
Therefore, you get an exclusive and packed info right now. Make yourself comfortable and enjoy, the secret is about to be lifted:
|
|
|
size comparison |
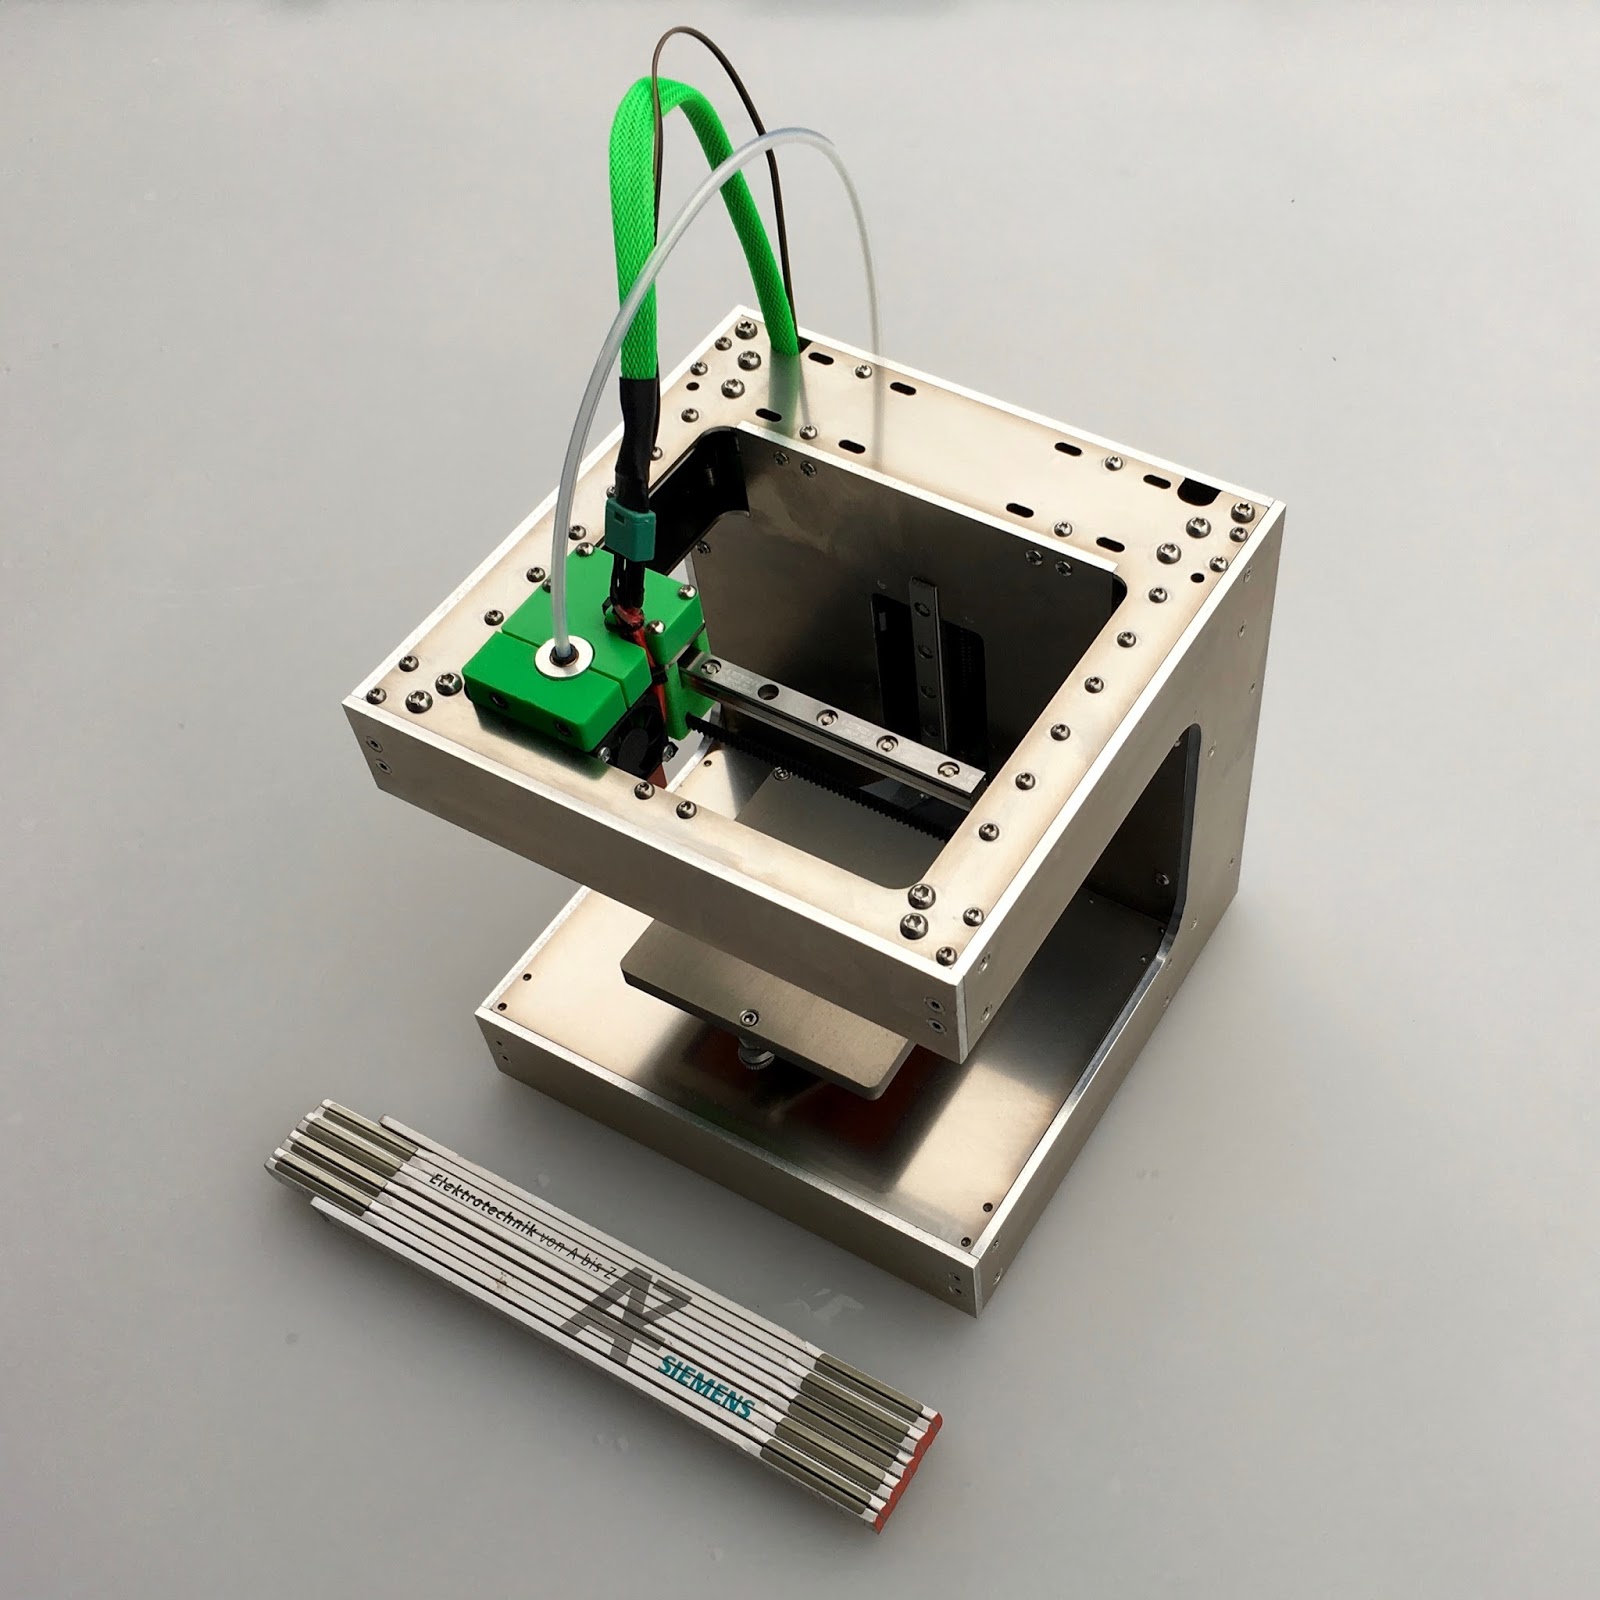
I already own a printer with a big buildvolume (bigger than 30x30x30cm) and because of the size it needs a lot of energy and is rather slow. That's why, I started to plan a smaller printer back in october 2015. It was clear from the outset that the new printer had to be small, precise and fast. Side effects of this would come automatically: less energy-consumption and easier handling in moving this printer around. On top of that, I wanted to build a printer that was beautiful too and assigned my priorities right from the start:
- clean look
- all parts inside the housing, even the powersupply
- use of high quality parts
- less than 20cm edge length
- silent
- compact and fast
And this is what I made out of it:
|
|
|
CAD view
|

Looking at this, it begs for its name:

It is my fourth printer - codename: DICE
With an overall dimension of exactly 20x20x20cm, one could really speak of a small dice. During the design and build of the DICE, I was able to consider all of my priorities - this was less easy than I had expected. The final version in CAD looks like this today:

It is the spitting image of the real one:

Now to the key features:
mechanical:
- casing: 20x20x20cm small
- buildvolume: X90 Y75 Z 80
- moveable distance: X98 Y75 Z80, so the printhead can move beside the printbed, e.g. for anti-ooze-scripts at printstart
- coreXY-system
- linear movement with high quality linear rails (HIWIN MGN9R) in X, Y, Z
- full metal hotend E3D-V6 1,75mm in bowdensetup
- PEI-coated perma-printbed made out of precission-milled warmcasted aluminium ( EN AW 5083 ) and recessed silicone heater
- direct-drive-extruder (MK8)
- massive enclosure milled out of 4mm thick akuminium, all bores in DXF included
- XY-plain is lasercutted out of 2mm thick stainless steel sheet, all bores in DXF included
- enclosure-sheets are conceived as load-bearing and stiffing parts, but can be dismantled all together without the printer falling apart.
- all parts are designed in a way to make adjustings easy and the components inside accessible.
- all parts are designed to use only one needed manufacturing technique (lasercut) and are repeating and symmetrically
electrical:
- AZSMZ-mini 32bit-controllerboard with smoothieware firmware
- 4x most silent TMC2100 stepperdrivers, passive cooled
- despite the small footprint, use of full-fledged NEMA17 steppermotors for sufficient output reserve
- heated bed (230V / 60W), with recessed silicone heater
- motor supply voltage: 19V
- total power input: 230V / 0,65A at max
miscellaneous:
- more silent than 50dB in realistical and normal operation (unadorned measures!)
- up to 1000mm/s travelspeed
- up to 10.000mm/s² acceleration
- not until 6.000mm/s² acceleration and 100mm/s, ghosting becomes barely visible
- junction deviation up to 0,5mm tested
- the complete X-carriage (real print-setup) weighs only 160g
- the complete X- and Y-carriages with all mounted parts (real print-setup) weighs only 290g
- Hotend mounted with 2 screws, fast interchangeable
- bowdenlength is only 35cm (complete from MK8 to the thermal barrier in the hotend)
To design the DICE was an unexpected experience and I had a lot of fun. The permanent challenge to get every detail perfect and to reach a valuable compromise in every aspect, still with the priorities in mind, was thrilling. On one hand, I had to make every part and every space as small as possible to reach the maximum buildvolume. On the other hand, things need to be convenient and accessible for maintenance and construction. On top of that, it should stay simple and with a clean design.
To reach all this, I did a vast number of designs for every part and sometimes started with a finished part all over again, when another part comes into play. I had a big advantage in using my existing 3D-printers. Its one thing to design a part in a CAD-software, but it is the complete other side to hold this part in hands and try if it works.
In my mind, the most challenging part to design was the printhead / X-carriage. The size of the carriage had a big impact on the later buildvolume. Every millimeter saved at the carriage was gained in more buildvolume immediately.
|
|
|
printhead with axial- and radial-fan, E3D-hotend |

I managed to design the whole printhead (including the 2 coolingfans and the linear-carriage) so compact, that the whole assembly isn't greater than 42mm x 56,6mm. A future upgrade would be a smaller hotend, which is the limiting factor right now.
|
|
|
view on the E3D-V6 |

With this compact printhead, the desired buildvolume of 8x8x8cm was reached. Just when in need for print-cooling, like for printing e.g. PLA or PETG, I have to pass on 5mm buildvolume in Y-axis. The previous planned coolingfan with his 30mm-formfactor didn't make sufficient cooling and had to move for a more powerfull, but bigger fan with 35mm formfactor. If not in need for print-cooling, a fast and simple change brings back the full buildvolume.
|
|
|
Bigger: "3510 radial blower fan" |

The remaining measures of the DICE were much easier to handle. They come from existing parts and if the part is moving, I added a "generous" 1mm gap to avoid grinding. Simply said: I worked myself from the outside in.
For example, the height of the XY-plain is exactly 38mm. This is apparent from two facts:
- The motor of the z-axis is a shorter NEMA17 with 34mm length, with 2mm sheet on each side. Without a recess for the motor-body, no smaller distance is possible.
- The smallest possible assembly of one Y-carriage with flange-bearings is exactly 33mm (I tried this several times) and allows for 1mm gap for the movement with the 2mm sheet on each side. I even use the smallest possible flange-bearings. The limiting part with this is the GT2 belt. The belt is 6mm wide and two MF104ZZ-flange-bearings have a runningsurface of merely 6,4mm.
|
|
|
assembly of the XY-plain with miniature flange-bearings MF104ZZ |

With the 38mm top plain given, I made it symetrically and used the same 38mm height for the electronic compartment at the bottom. I needed to find a power supply that fits inside and is able to deliver up to 60W (so I need 90W because rule of thumb: don't use a powersupply at 80% or more of it's size). All popular affordable industrial power supplies in the needed powersize had too much design height. And all racking controllerboards, like RAMPS or RADDS are oversized, too. The GT2560 and the AZSMZ-mini have been shortlisted for mounting.
|
|
|
GT2560 (8bit) |

|
|
|
AZSMZ-mini (32bit) with powersupply |

Short before, I had the occasion to try out a Smoothieboard and because of this the decision was easy: I picked the smoothieware-compatible 32-bit-board AZSMZ-Mini. Who once experienced smoothieware with it's ease of use and drag'n drop functionality, knows what's good and will never change back to repetier or marlin.
Although stacking the stepperdrivers (TMC2100) with it's rather big heatsink was possible and would have fitted inside, I did take another path. With the use of the conventional heatsinks, I still would have had to use an active cooling and if you look closely on the picture above, I already designated two 30mm-fans for this. But I wanted to avoid additional soundsources and thought about cooling the stepperdrivers passively:
|
|
|
TMC2100 ready for passive cooling |

I put all stepperdrivers on the thick sheet right beside the controller-board. Because of its size, the 4mm thick sheet is an impressive heatsink.
|
|
|
TMC2100 stepperdrivers passively cooled |

After hours of testing without loosing steps, I was sure that the stepperdrivers stay cool enough the whole time. But I still have one fan operating: it's a 12V-one connected to 5V and therefore inaudible operating. This makes a small airflow for the powersupply and the controllerboard, just in case. Additionally, this small airflow reduces the temperature of the "heatsink" drastically. And needed or not, the CPU on the AZSMZ-mini got its own nice heatsink:
|
|
|
heatsink on the CPU of the AZSMZ-mini |

This two 38mm high, horizontly plains leave exatly 124mm room for vertical movement of the z-axis. Deducting a carriage-length of 29mm of the linear-carriage (MGN09CZ0M, Hiwin), I ended with 95mm possible stroke.
|
|
|
sideview DICE |

One need to consider, there is additional room needed for the printbead-adjustment and depending on the mounted nozzle, there are even some more millimeters needed. The planned printheight of 80mm left enough room to design the adjustment for the printbed generously. Additionally, I could lower the hotend a bit more, to get it more "inside" of the printer itself.
The back of the DICE is exactly 51mm thick. This is the exact size the mounted NEMA17 need to fit in, not more.
|
|

The touching sheets are functioning a bit as additional heatsinks, the motors do stay cooler. If you look closely, you will recognize that there is no clutch on the z-axis. Because of reasons of space, I used a motor with integrated spindle, a TR8x4. Beneath the 3 motors for the X,Y and Z-axis is enough room for the extrudermotor and the 230V-plug with integrated switch and fuse. For a better view, here is a render instead of a fotograph:
|
|
|
render of the backside without backplate |

The NEMA17 in this picture represent a good size comparison for the size of the DICE. Remarkable is, that all mounted steppermotors are mounted in one plain and are located right beside each other. Even the extudermotor is mounted inside and only peaks outside with its shaft. On the outside, I mounted the most compact Extruder I know about. The author of this design did respond to my needs and made some changes on his design for me. That's why I could mount the best possible design.
|
|
|
"compact bowden extruder" on the backside |

|
|
|
backside with USB-Port, powerplug and Extruder |

The extruder is a printed one with an MK8-gear and made for 1,75mm filament. This extruder is used on all my 3D-printers and I am very pleased with it. Super simple, super cheap to make and super reliable.
If dismounting all of the cover panels, the inner frame is still able to hold everything in place. This makes any maintenance or adjustment very easy, even in this tiny printer every part stays reachable.
|
DICE without cover panels and with printed frameparts |

While building the DICE, I printed the custom parts to check if everything fits together.


The same parts could also be made out of aluminium, which I did to get an even more quality build.
A further remarkable detail is the independent XY-plain. The whole assembly of the X- and Y-axis is mounted between the two lasercut stainless steel sheets and because of the given mountingpoints, the linear rails just fit in place with little to no further adjustment needed. Besides that, it is possible to test the coreXY-movement right at beginning of the overall build:
I was expecting the DICE to print well, but that these high setting would affect the print in such a positive way blew my mind. At settings with lower layerheights, this is even more visible. I will investigate this at a later point and will do an additional posting about my findings.
|
|
|
3D-Benchy |

|
|

Tags: DICE

