
Printhead change made easy!
When equipping the DICE with the new Magnetic interchangeable printheads for the DICE, there comes the "problem" how to get two different extruder-motors to run with this setup easily. Because, depending on which extruder is going to get used to print, the corresponding stepper motor has to be controlled with the matching stepper driver.
Thankfully, because of some features of Smoothieware and Octoprint this is easy to reach! In short, only the pins for the specific stepper driver have to be altered and additional the parameter of "steps/mm" for the extruder in case. I am going to explain in this post how I did it. You can also use these instructions to modify your existing setup or config to your needs on the fly, too.


In these pictures one can see, that I use the previous empty first socket of the AZSMZ for the stepper driver of the added direct-extruder. The needed pins for this socket are:
step_pin 2.0
dir_pin 0.5
en_pin 0.4
also, I needed the pins for the 5th socket, the existing bowden extruder, too:
step_pin 2.8
dir_pin 2.13
en_pin 4.29
Because I was already digging through the config.txt, I looked up the parameters for steps/mm for the extruders:
steps_per_mm 418.5 # Titan Steps/mm
To use this information afterwards, I use the Smoothieware command 'config-set'. With this command, parameters in config.txt can get changed permanently. With a forced reset after changing a parameter, the changes become active instantly. For example:
I combined all this to the following code snippet (with matching variables for my provided config.txt for the DICE):
# direct hotend:
config-set sd extruder.hotend_1.steps_per_mm 418.5 # Titan Steps/mm
config-set sd extruder.hotend_1.step_pin 2.0 # driver socket 1
config-set sd extruder.hotend_1.dir_pin 0.5 # driver socket 1
config-set sd extruder.hotend_1.en_pin 0.4 # driver socket 1
# bowden hotend:
config-set sd extruder.hotend_1.steps_per_mm 145 # bowden extruder Steps/mm
config-set sd extruder.hotend_1.step_pin 2.8 # driver socket 5
config-set sd extruder.hotend_1.dir_pin 2.13! # driver socket 5
config-set sd extruder.hotend_1.en_pin 4.29 # driver socket 5
When sending the specific 4 rows with the 'config-set' command to the AZSMZ-Mini (or every other smoothie-compatible board), the parameters get switched to the respective extruder motor.

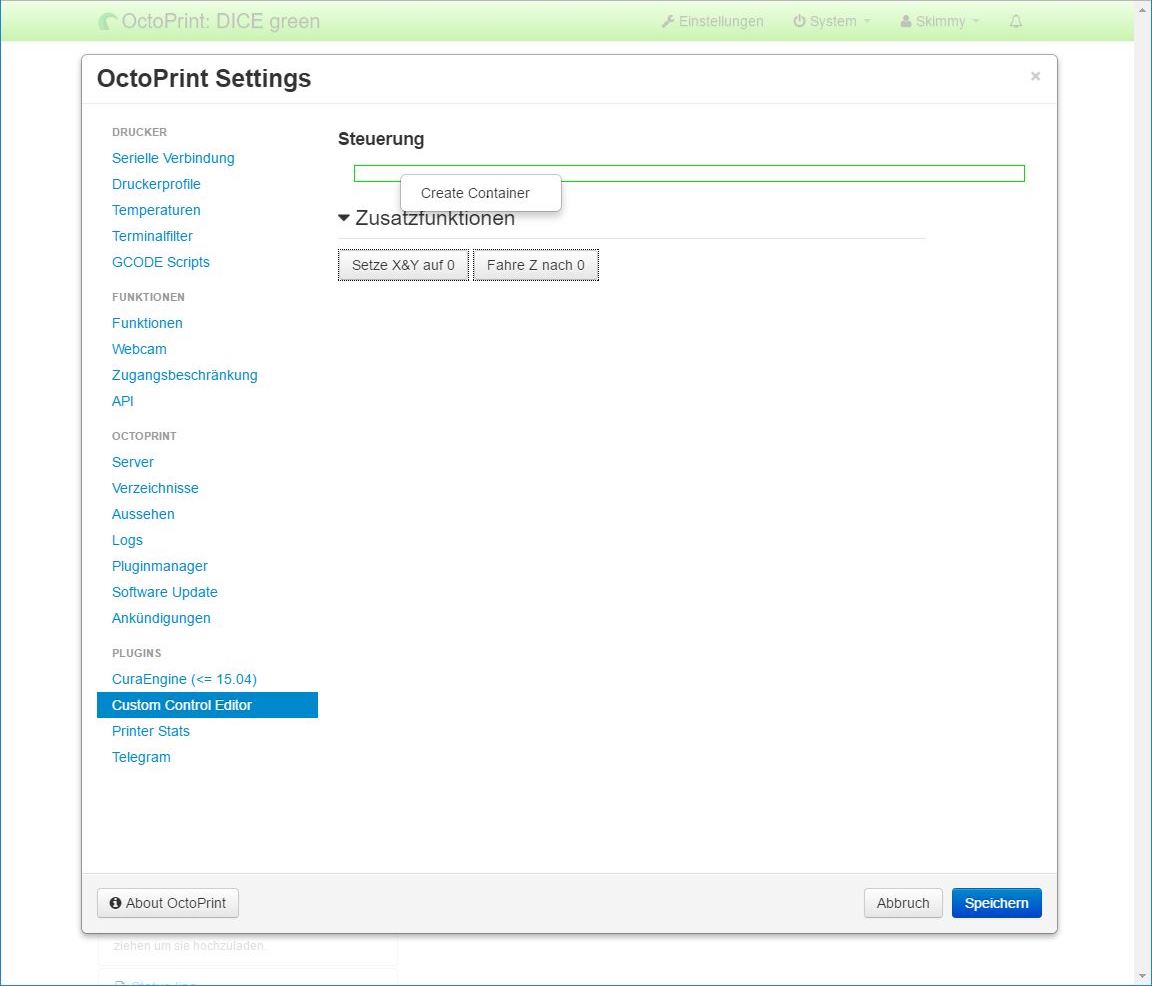
In the octoprint-GUI, I installed the plugin "Custom Control Editor" first. With this plugin, you can add butttons with own commands to the GUI. For the ones who don't know this plugin, you need to know a thing first: After installing the plugin, there is only a flat green rectangle in the settings-dialog, nothing more. This surprised me at first. But for adding a button, you have to create a 'container' first. These containers are used to arrange the buttons in the GUI. To create a container, right-click on the flat green rectangle and choose "add container". Give it a name and than right-click beneath the now existing container to "add a button".


At the settings for this button, I just copy'n paste the code from above for the direct-extruder:
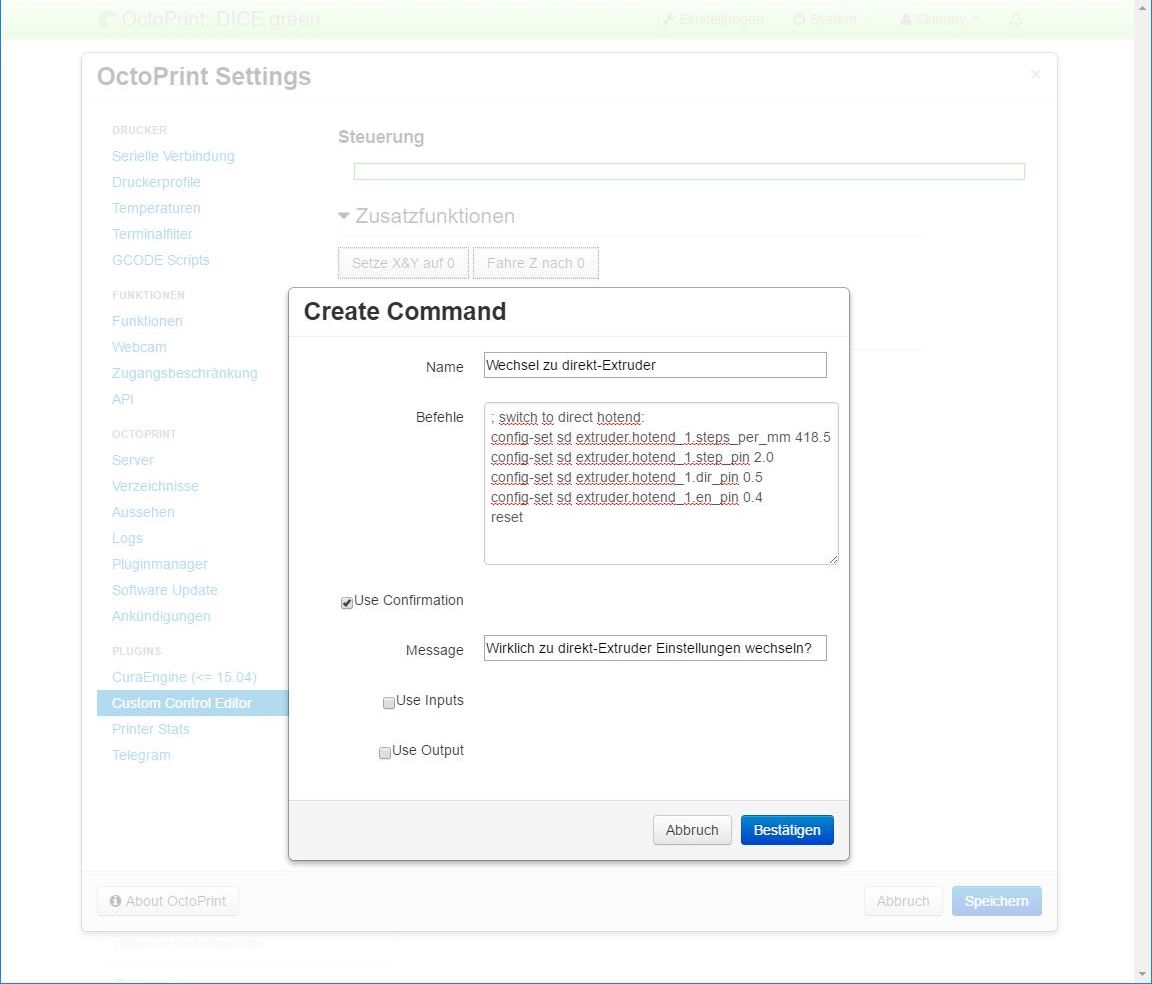
I do the same for a second button, but change the parameters to the Bowden extruder. Additional, I choose to "verify command", to prevent accidental clicks. Now, I have two new buttons in the control-tab:

A click on the button "change to direct-extruder" sends the commands via console to the board. Note, that the AZSMZ-Mini is also going to reset. So you should click this button only in idle ;)

After 5 seconds, the board boots up again and octoprint connects itself with it. That's it. Now, to change the settings for each extruder, all you have to do is 2 mouse-clicks!

